Guest Post: Edit Wedding Photos Faster With Photo Mechanic by Tiffany Wu
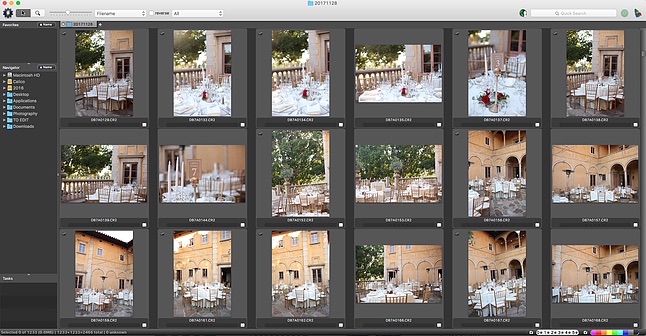
One of the longest and most tedious parts of editing is the culling process. Culling is when you select which images you want to keep, and which you want to delete. It’s not so much a big deal when you’re shooting for fun. However, when you’re a professional portrait or wedding photographer, this process can take hours when you’re going through hundreds or thousands of similar images.
I had heard about Photo Mechanic in a few photography groups, but didn’t think I needed to invest $150 in it when I already had Lightroom. After all, Lightroom also lets you process RAW images and has a flagging system to select, color, and reject images.
Boy, was I WRONG! Photo Mechanic has become a game-changing part of my editing process and was worth every penny. If you’re a portrait or wedding photographer, here’s why you should invest in Photo Mechanic.
Note: I only use Photo Mechanic for culling and sorting through images. I use Lightroom for all my editing!
1. Faster Import Time
When you’re importing thousands of images from a wedding, Lightroom can take a while to import and process the images. Meanwhile, Photo Mechanic imports them effortlessly.
2. No Load Time!
This is the biggest reason why I LOVE Photo Mechanic. When you are clicking through your RAW images on Lightroom, there’s a one second delay (or longer if you’re using a slower computer). This is because Lightroom is trying to process the RAW image.
When you click through the images on Photo Mechanic, there’s no delay at all! It’s like the program treats the images like JPEGs and you can fly through the images quickly, This has saved me HOURS of editing time!
3. Faster Lightroom Workflow
Instead of importing all the RAW images from a wedding, I’m only importing the culled ones that I know I’m going to keep. With less images, Lightroom can work faster and more efficiently while I’m editing.
My Favorite Features
Here are some of my favorite, most used features and shortcuts when using Photo Mechanic:
Easy Integration with Computer Files
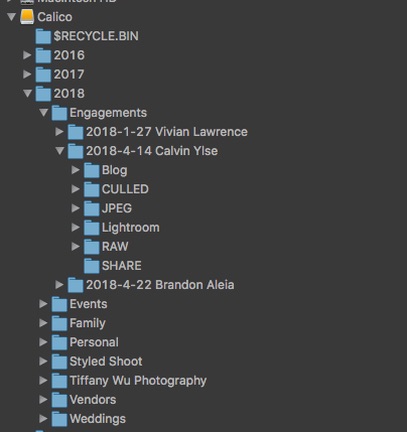
All of my computer files are easily found in the left-hand window. Once I’m done selecting the images, I drag them into the folder I need, and then I can easily import that folder into Lightroom.
Here is how I usually sort my sessions using Photo Mechanic:
Year > Session Type > Date-Name-Session Type >
> RAW (this is where I usually ingest the files from my memory card into Photo Mechanic)
> CULLED (this is where I move the files from Photo Mechanic into and import into Lightroom)
> JPEG (finished photos)
> Lightroom (folder that holds my Lightroom catalog)
> Blog (Photos I’m going to blog)
> Share (Photos for social media)
Shortcuts
The most used shortcuts I use are the following:
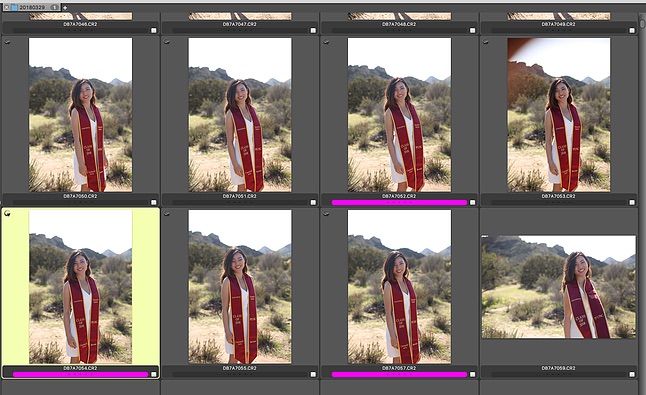
Right/Left arrow keys: use these to navigate through photos
0: deselect
1-9: these are color selectors. I mostly use 1 for photos I want to keep, 2 for favorites, and 3 for behind the scenes
Z: lets you quickly zoom in on a photo
Sorting Feature
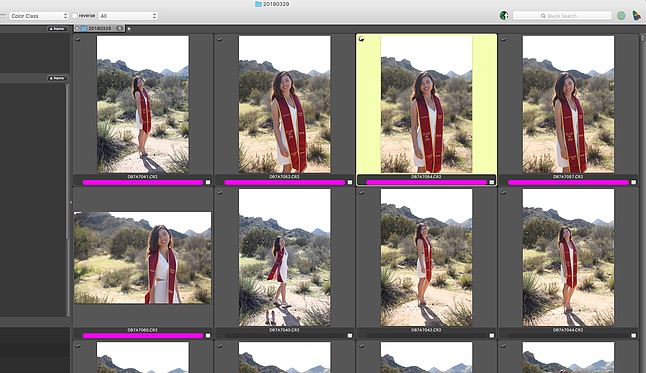
Photo Mechanic easily sorts your photos quickly. I usually have it sort by capture time in reverse order (trick from Katelyn James Photography to save time!). I’ll use the color selectors to pick my favorites, sort by color and remove more, and then move the photos I want to keep into the CULLED folder to import into Lightroom.
I hope this helps! For more photography tips and resources, you can visit my website!
This article was written by Tiffany Wu
Did you learn any new tips from this post? Got any tips of your own to add? Let us know on Facebook and Twitter and follow us for more tips every #WorkflowWednesday.
Haven’t tried Photo Mechanic yet? Sign up for a free 30-day trial here!